BT2 Manual
Current version: 2.38 Windows OS
Introduction
Brain-Trainer 2 (BT2) is designed to increase flexibility in a wide range of habitual brain energy habits using a variety of types of feedback to guide lasting real world changes in cognition, mood, control, physical functions and performance.
BT2 software receives data from an amplifier and processes it to present visual displays and auditory feedback. To run a session, apply sensors to the trainee, connect and power on your device, open BT2 and select a protocol/design and press “Play.”
Disclaimer: The Brain-Trainer 2 (BT2) is designed to train habitual energy patterns related to desired changes in brain function and performance. IT IS NOT INTENDED AS A TOOL FOR DIAGNOSIS OR TREATMENT. If you have any problem with the BT2 software, please report it by sending an e-mail to [email protected].
BT2.25 video | NEW Interface with exciting new features.
This is one of the most innovative updates so far:
New interface for the training screens
Component settings menu
2D spectrogram
Setting Up Your BT2 Software
Download
After your purchase you should receive an order email with download and license information. Save this email for future reference. It contains your license key.
Save the BT2 installer to your computer. The likely location by default is your computer’s Downloads folder. You can then open the Downloads folder to find the file you have downloaded.
Once a file is saved to your computer it is ready to be run.
Installation
Run the setup installer by double-clicking on the setup icon.
License activation
After your purchase you should receive an order email with download and license information. Save this email for future reference. It contains your license key. Your key can also be found in your shop account.
Activate the program with your BT2 license key. This is mailed to you upon completion of your order. Copy the license key from your email and paste it into the field when prompted.
Installation Tip:
When one reinstalls BT2, what is actually being reinstalled is the launcher application. If the person runs BT2 right after the installation, he/she will still see the old version of BT2, but the launcher will be installing the new version in the background.
User Interface
BT2 has a completely redesigned interface. It’s visually modern, intuitive, and optimized for a better user experience.
You can also switch between two interface modes: ‘Dark Mode’ and ‘Light Mode.’ To change this setting, go to the ‘Settings’ menu, under the ‘Appearance’ tab, and select your preference. By default, the software opens in Dark Mode.
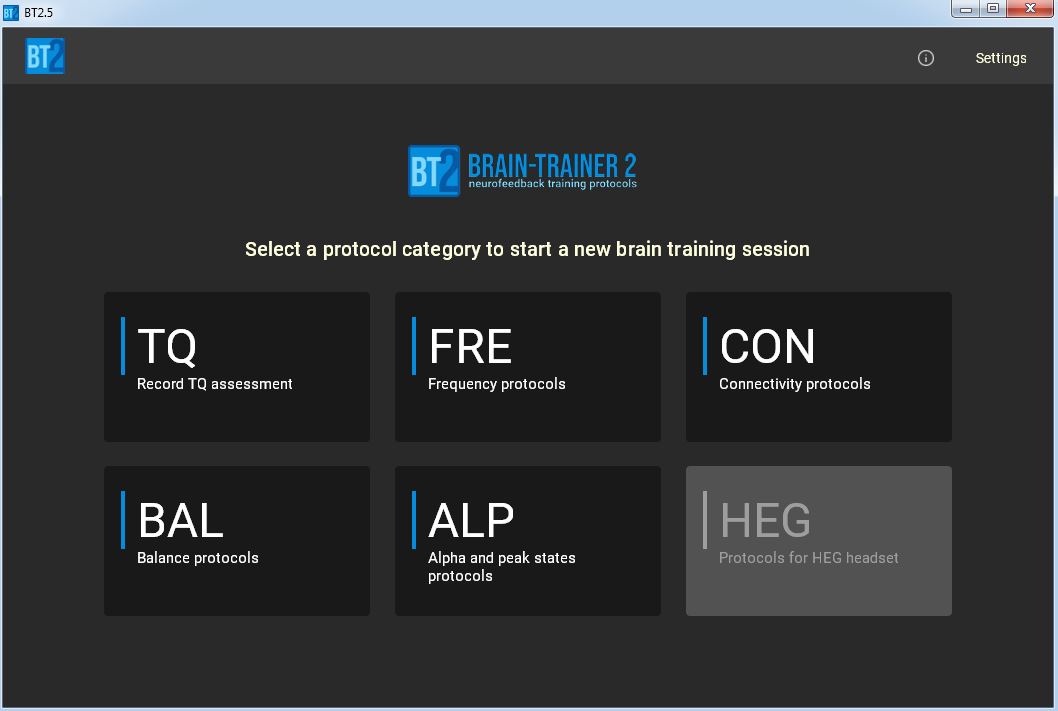
Home Screen
When you open the program, in the title bar at the top you see the name of the program and the version (e.g. BT2.10). Below this you will find Settings and help icon Help/information about the program and settings. Clicking the info button will open a window where you can access this online manual. The protocol category menu is displayed and you select one by clicking on it to begin training.
Settings
Select settings before you begin. See below for different setting options.
System Tab
Language
The preferred language is selected here. Current language options include English, Portuguese, Spanish and German.
License key
The license key currently registered is shown here.
Release type
The type of release can be selected. “Standard” is the preferred option for most people as it will be the most table version.
People who want to have access to new features first hand could choose “Beta”. Beta is updated more frequently than Standard. Changes are made available to Standard about 10-15 days after being validated by Beta, unless it’s necessary to make corrections.
Alpha is for certain users who have agreed to test new features.
Update status
Update activity will be shown with a progress bar here showing the download of any new files. The software version is shown if there are no updates in progress. To see the changelog, click the version link to open the changelog window.
Session Tab
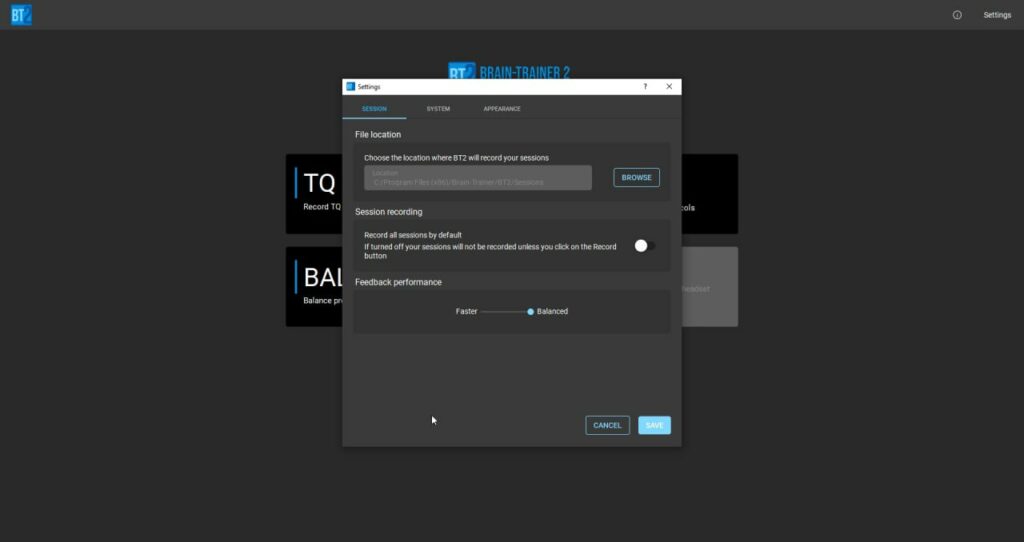
File location
Session tab see “File location.” This is the default location where your program will save your recording files and where you will go to select and open a saved recording for review. The default location is C: \ \ Program Files (x86) \ Brain-Trainer \ BT2 \ Sessions.
If you wish to change the default location, click the Browse button. Navigate to the directory (folder) of your choice where you want to save and find recordings. Click Save.
Session Recording
If you want to record all sessions automatically when you begin a session, turn this setting on by sliding the circle to the right. Click Save.
Feedback Performance
Feedback Performance allows you to select how much processing power will be used to generate the feedback response. The closer the slider is to “Balanced,” the fewer system resources are required.
To use “Faster,” a computer with high processing capacity is required.
If someone experiences freezes or performance issues during training, it is recommended to move the slider closer to “Balanced.”
Close Settings.
Appearance Tab
Color Mode
Use the slider button to toggle between light mode or dark mode according to your preference.
Logo
Upload your own custom logo to display your branding on the opening splash screen. This is purchased in the brain-trainer shop.
Use the slider button to toggle between original logo and your purchased custom logo as desired.
Close Settings.
Settings Configuration Demo video
Opening Designs
Accessing Protocols
Once you have selected a protocol category, the options for designs are displayed in the “Start new session” window. Select one of these to open a design. A listing of designs is below. A common first protocol is “Amplitude.”

Controls
Once a design is open, the program version is again at the top title bar and the control panel is visible below that.

In the training screen, you’ll notice the menu is divided into five key sections:
- Device Configuration
- Feedback Configuration
- Session Control
- Training Parameters
- Navigation Buttons
Here are the highlights of what you’ll find in these sections:
- Select and configure your device
- Test the signal quality
- Adjust the number of channels and linked references
- Choose your feedback type and settings
- Select music and control audio feedback (mute/unmute)
- Manage session controls like ‘Record,’ ‘Play/Pause,’ and ‘Stop,’ as well as session timing options, including breaks
- View the statistics panel to monitor key parameters
- Access specific training design settings, like protocol presets and the expandable oscilloscope
- Open the manual directly through the help button
- And easily navigate back to the main menu with the back button.
Session Settings
Device configuration – Device connection, Electro-Cap settings (coming in the future), load file for playback. Blue indicates the device is connected; red indicates it is not connected.
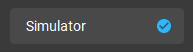
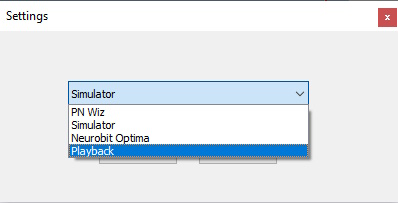
Source settings – Select your source (e.g. simulator, playback, amplifier)
Currently the only amplifiers supported are Neurobit Optima and Pocket Neurobics Wiz devices.

Signal tester – Open display window to show oscilloscope and spectral analyzers.
This window can be resized and may be left open during the session if desired.

Statistics panel – Open window to display amplitudes and set other parameters for analysis. This window can be resized and may be left open during the session if desired.
The statistics panel has been enhanced to give you deeper insights during your sessions. It now includes three tabs:
- Frequency Bands
- Parameters
- Spectrogram – our newest addition.
The spectrogram provides a dynamic visual representation of frequency changes over time, offering a new level of detail for tracking your session’s progress.

Channel selector – Select number of channels to be trained.
Select 1, 2 or 4 channels
Feedback selector – Select the kind of feedback to use for the session.
MIDI will always be on. Select additionally from music, shadow, games and video (to come)

Feedback settings – Set configuration for feedback (e.g. game, shadow brightness)
Some games have a volume control that is accessed by the game settings within the game.


Audio button – Turn off the session music. This turns off all the design music but not game feedback.

Sound settings – Configure the sound feedback. Select songs, change MIDI and click rules. Click sound can be turned off here.
Session Controls

Play – Press to start the session / data flow.

Pause – Press to pause the session but not stop the condition completely.

Stop (ready) – Press to stop. Data flow is going.

Stop (on) – Data flow is off.

Record (ready) – Press to save the session recording. This automatically comes on for assessments.

Record (on) – Session is being recorded.
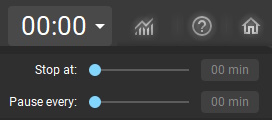
Session time – Duration of the session is displayed in the timer window.
Press to set a stop or pause time.
Design Settings

Design settings – Select options for the particular design.
In this example amplitude is selected. In MBC select up or down.

Custom protocol presets – Some designs have special settings preset. These already have settings determined and the user needs only to select a preset protocol and frequency bands, channels, etc. are already in place. Custom preset protocols are typically specified in the whole-brain training plan.

Chime threshold – This option will make the “chime” feedback sound threshold visible to the trainer. This threshold is hidden by default as it is not intended to be adjusted. This is available on the FRE: Amplitude design.

Enlarge oscilloscope – Select this to expand the oscilloscope.
This is useful for getting a detailed look at the raw EEG.

Threshold quick set – Selecting this will set all thresholds to channel 1.
This saves the trainer from setting each threshold separately

Software manual – Here is a link to the online BT2 instruction manual.

Home menu – This takes you back to the home page protocol category menu. Open a different design.
We’ve also added configuration menus to key components like the Trend Graph, Spectrum, Threshold, and Spectrogram.
Simply right-click on any of these components and select ‘Open Menu’ to access a variety of settings, such as:
- Graph ranges
- Colors
- Time span
- Titles
- And general functionality adjustments.
Currently, these customizations cannot be saved, but this functionality will be included in an upcoming update.
Other Controls
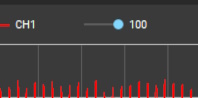
Sliders in spectrum analyzer and oscilloscope allow zooming in and out while training to better visualize the signal and its quality. When re-opened, the sliders will return to their default settings (e.g. 10 for spectral analyzer
Using your BT2 Software
Close any other biofeedback software programs that may connect to your amplifier. As a matter of practice, always connect the amplifier and turn it on first. Then open the BT2 program. Appropriate use is to plug in, power on your amplifier; open the software for your session; close BT2 after use. If the amplifier is unplugged or turns off between sessions, close BT2, connect and turn on your amplifier and reopen BT2 for the next use.
When you open the BT2 software to train, you will see several protocol categories from which to choose. Your Whole-Brain training plan will specify which category using a three-letter indicator before the protocol (e.g. FRE: Amplitude).
Connecting Your Device
Before beginning a session, open a design of your choice and select the source (e.g. Optima) by clicking the icon with a dash and half-cirle. Simulator is selected by default and is good for testing to see what a design will look and sound like in a session. [source button highlighted] Select your amplifier by clicking the “Source” button. Then choose your amplifier from the dropdown menu.
Starting the Session
Start the session by pressing “Play.” Stop by pressing “Stop.” If you have selected the System setting to “Always record” the record window will open. If you have not selected that setting but wish to record, press Record first, select your client and then press play. See more details below.
Tip:
BT2 software will not connect with an amplifier that is already connected in another software. Please close other biofeedback software before connecting your device.
Recording a Session
Open a design. Click on a design category (e.g. FRE). Then select a design (e.g. Amplitude).
Select settings for your session (number of channels, link/unlink references, feedback, inhibit and reward bands).
When you are ready to begin, click Play (triangle). If you have selected to record all session, the “Record session” window will open. Otherwise, click the record button (circle) and this window will open.
The first field is “Client.” Select a client using the down arrow. If no client has been created, click the “Add new” button. Enter the client name.
This will create a client folder inside the directory you have chosen for saving recordings. Now the client name will be shown in the “Record session” window.
The next field is “Complement.” This means some addition to the file name that will help to identify it. A useful complement may be the date, the session number or some identifying detail about the protocol. This may be left empty.
“Session number” is shown displaying which session this is for the client. This is based on the recording files that are present inside the client folder on each date.
“File name” is the name the program gives the recording. The design is part of the name. The complement will change the name visible and you can see what will be the final name.
If you decide not to record the session for some reason, click Cancel. Otherwise, click OK.
When the session is complete, click the stop button (square).
Viewing a Recording
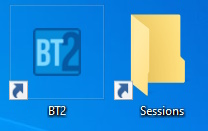
Easy access to the Sessions folder is the shortcut on your desktop labeled “Sessions.”

Inside here you should see any recordings you have completed.
To send a recording, attach the file to an email or upload to a designated location if requested.
Playing Back a Session
To re-play a recording, open the BT2 program. Open the design used for the recording.
Open the Settings window of the design by clicking the Source button (dash with half-circle). Select “Playback” as the source. Click Ok.
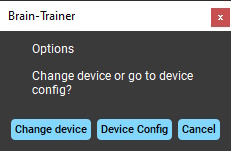
Open the Configuration window by clicking the Device configuration button (colored button with name of the source).
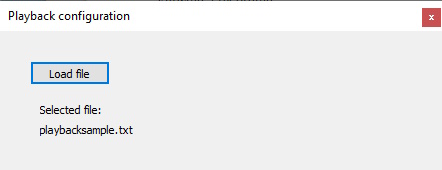
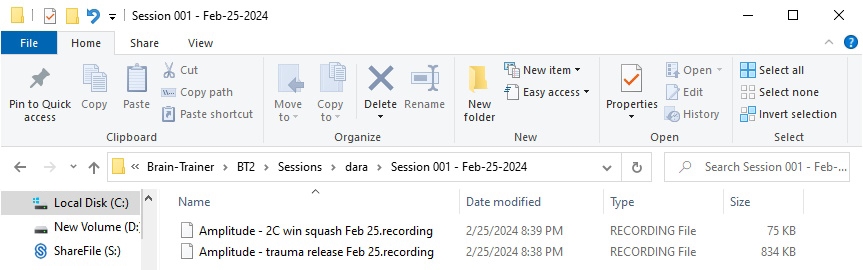
Click “Load file” and navigate to the client folder and select the file you want to view. The location may look like this:
C: \ \ Program Files (x86) \ Brain-Trainer \ BT2 \ Sessions \ dara \ Session 001 – Feb-25-2024

Now press Play.
Instruments
Thresholds
In BT2, thresholds usually have a calibration time of 30 seconds. This means that during the first 30 seconds of the training, the thresholds will be in automatic mode. After this period, they switch to manual mode (i.e., they remain fixed at their last position, and the target can be adjusted manually).
The Epoch parameter in the threshold menu refers to the period of time over which the object calculates statistics from the input signal. These statistics are used to determine the thresholds in Auto mode and to display the percent success for a given threshold value in Manual mode.
The unit is seconds, and the default value is 30. The Epoch parameter serves two purposes:
- Calculating the success percentage.
If the Epoch value is 30, it means the success percentage reflects how many (as a %) of all the samples over the last 30 seconds were within the expected range (i.e., below the threshold for inhibits, above the threshold for rewards).
Note that this value is used solely for monitoring purposes — it does not affect the feedback. I believe the values you mentioned (between 0.5 and 2 seconds) would make sense in a context where this number was used to produce real-time feedback. - Defining the threshold during Auto mode, based on the success percentage.
As far as I know, most neurofeedback programs (e.g., BioExplorer, NeuroGuide, BrainMaster, etc.) use 30 seconds as the default for this. I would be interested to know if there is any system that uses a much shorter value.
In BT2, when used during the Baseline period, the threshold will be set to Manual mode at the position corresponding to the success rate over the baseline period.
For thresholds that remain in Auto mode throughout the protocol, the position will correspond to the value that maintains the success rate based on the last 30 seconds.
Here’s how the two modes work:
- Automatic: The threshold is recalibrated every time a new sample comes in (or more likely, a very small batch of samples). The new value is the position that keeps the success rate at the defined level over the last X seconds, with X being the value set in the Epoch parameter. So, for example, if the success rate is 80% and the Epoch is set to 30 seconds, the threshold will adjust with every new sample to maintain 80% of all samples from the last 30 seconds within the target range.
- Baseline + Manual: The threshold will remain in Automatic mode during the baseline period (30 seconds) and then switch to Manual mode. The threshold will stay fixed at the last position from the end of the baseline period. After that, the success rate displayed reflects the percentage of samples within the target range over the last 30 seconds (or any other value you define for the Epoch parameter).
Editing Threshold Settings
Change or set frequency range
Use arrows or type over the number in the window.
Change success rate
Right-click on threshold’s percent and click “Open menu.” Change the number to the percent rate you desire.
Choosing protocols
Preset Protocols
There may be a number of preset protocols from which to choose. When a preset protocol is selected, the settings are automatically put in place.

In this example FRE is selected as the category and Amplitude is selected as the design. No Protocol Preset is selected by default. Click the down arrow to display the list of possible preset protocols. Use the scroll bar as needed to show items lower on the list.
selecting preset using scroll bar to view options
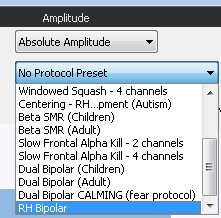
Once the preset protocol is selected, the number of channels (4) and amplifier linking is already set. All the reward and inhibit thresholds are activated with correct frequencies entered. Now select the feedback type desired.
Customizing a preset protocol

In the above example, the recommended protocol is SMR% using 2 channels. When SMR% is selected in the software, we see that there is a preset option for adult or child. Select the one appropriate for the trainee. Once selected, this preset option shows 1 channel will be used, though in the training plan 2 channels are indicated. This is a customized choice made by the trainer. In this case, once the preset is selected, use the down arrow to select 2 channels.

Manually Selecting Protocols
The Whole-Brain Training Plan indicates which settings to use. Many of these will not be preset options and they will instead be set by the trainer. These include number of channels, linking or not linking or references, number of thresholds for rewards or inhibits, and frequency bands.
Number of channels, linking references, activating thresholds, entering frequencies

In the example above, “Summed” will be selected from the FRE category. A single common reference will be used, which means “linked” references for the amplifier. Tick the box next to “Link” to link references.

Only one inhibit is used and no reward is used, so these thresholds are de-selected in the software to disable them. The frequency range is 19 Hz – 38 Hz as indicated in the training plan, so the first number entered here is the low end of the frequency band (19). This number is typed into the box using the computer keyboard. Click on the box, delete the numbers to be replaced, then type in the number you want. The second number is the high end of the frequency range. Clear the box (delete what is there) and enter the number. Settings will be applied without further action.
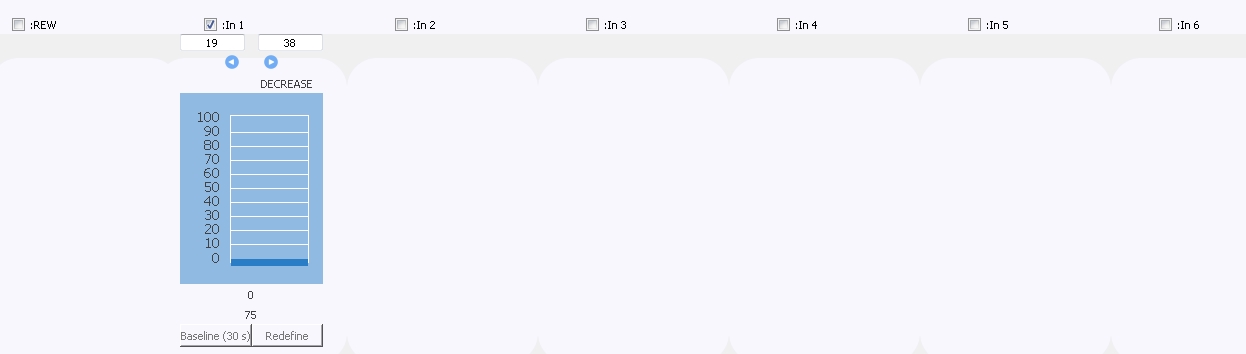
Notice in this design example there are 6 possible inhibits. Using this many thresholds would be a special case and the trainer would indicate this on the plan. In this case, we have just one inhibit and no rewards, so all other thresholds are deactivated.
Up, Down, Combined – CON: MBC

In the above example, MBC will be selected from the CON (Connectivity) category. Coherence is trained with linked references so this linked setting will already be selected when the design is open. The training plan specifies that 2 channels will be trained, so be sure that “2 channels” is selected. Options for this design are Down (decrease fast coherence), Up (increase slow coherence), and Combined (increase slow and decrease fast coherence). Use the down arrow to select the appropriate setting. If your training plan indicates “Combined” you have the option of using this combined setting or to train in UP for a period of time and then train Down for a period of time. This can be useful if the challenge is too difficult to do both simultaneously. “Rocking” will train in the opposite direction (e.g. decrease slow coherence). This is used for a short time and then de-selected. See more on rocking.

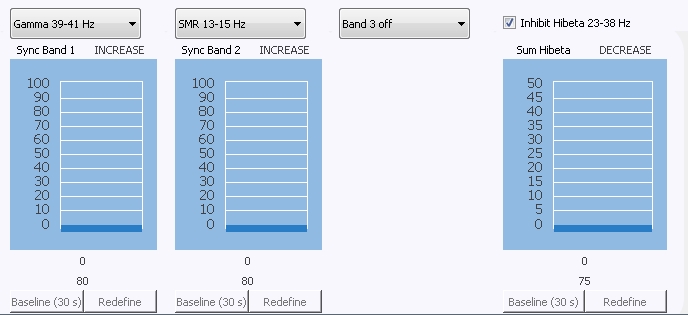
Selecting bands – CON: Sync

In this example we will select two of three available bands to train, gamma and SMR. The third band will be left off. The high beta inhibit can be left on unless there is a specific reason to deactivate it.
Protocol Descriptions
Protocols are selected first by category (e.g. FRE frequency) and next by type/function of the protocol (e.g. Amplitude).
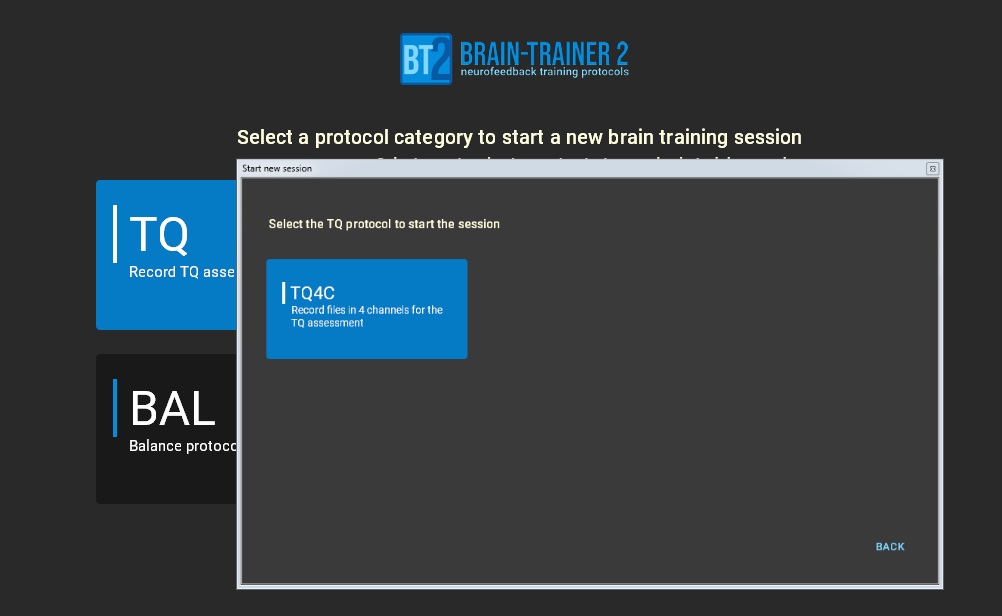
TQ – Record TQ assessment in 2 or 4 channels.
FRE – Frequency protocols. Training uses EEG amplitude for targets.
- Amplitude – Increase or decrease any combination of frequencies. Each channel is calculated individually.
- Summed – Summed amplitude of all channels. All EEG channels are summed first, so training and feedback are based on a single input for all thresholds. Multiple inhibits (maximum of 6) can be used for the single summed signal. In the future, the threshold percent success rate can be set higher (e.g. 98%) when more targets are used.
- Difference – Decrease the difference between two bands.
- Peak Frequency – Optimize alpha, beta and overall peak frequency.
CON – Connectivity protocols.
- MBC – Coherence in multiple bands.
- Sync – Increase coherence and phase in up to 3 bands.
- Coherence – Coherence in a single band along with frequency training.
- Phase Sync – Reduce phase lag in multiple bands.
BAL – Balance protocols.
- Alpha-Beta – Produce proper asymmetries of alpha and beta.
- Sum & Difference – Reduce amplitude and asymmetry.
- Multiplex – Train amplitude, asymmetry and synchrony all together.
ALP – Alpha and peak states protocols.
- Alpha Up – Increase alpha amplitude and raise alpha peak.
- Alpha-Theta – Deep states protocol.
- HEG – Protocols for HEG headset. Currently this design is not available.
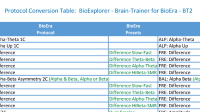
Protocol Conversion Table
The conversion table can show equivalent protocols for older software programs.
If you have used Brain-Trainer for BioEra or Brain-Trainer designs for BioExplorer, you may find the Protocol Conversion Table useful to show which protocols in BT2 will do the equivalent training.
Click to open the Protocol Conversion Table
TQ Assessment Gathering
The TQ8 assessment design will automatically move from one condition to the next and from step to step (EC, EO, etc.) with a prompt from a dialogue window that the user will click to allow the assessment to continue. This simplifies the process. However, any step may be selected and recorded or re-recorded as the trainer wishes by clicking on it.
General Information on Performing the TQ Assessment
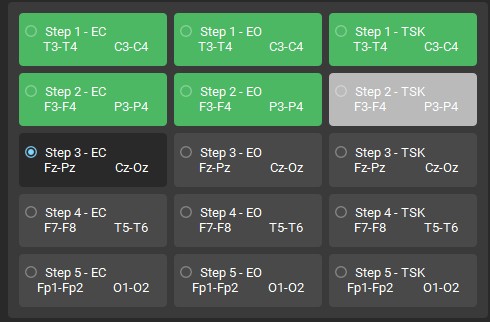
Color indicators
Each step has color indicators for the data gathering.
- Radio button (blue circle) indicates the active step
- Green = there is a recording that contains sufficient (>30 seconds) valid data
- Grey = there is a recording but it is not complete (<60 seconds)
- Dark = no recording at that step
- Red = there is a recording that is completed but it contains too much artifact
Preparing to Record
Connect your amplifier and power it on. Then open the BT2 software. Select the TQ protocol category and then the TQ protocol (design).
You will be prompted to select a client or add a new one. This will be where the recordings are saved.


Select your amplifier by clicking the “Source” button and then choosing your amplifier from the dropdown menu.
Once the client is prepared with electrodes, check the signal quality. Correct any issues. Optima users, check impedance
Impedance instructions
Open Device configuration. Under “Impedance Test” click Test. Impedance values for each channel electrode is shown in kOhms. Acceptable resistance range for electrodes:
- 0 – 5 kΩ (kilohms) is ideal.
- 5 – 10 kΩ is generally acceptable.
- 10 – 20 kΩ may still function but is less desirable (can increase noise and decrease signal quality).
- 20 kΩ is typically considered too high and indicates poor contact or a potential issue (e.g., dry electrode, poor skin prep, faulty wire).
Recording Assessment Data
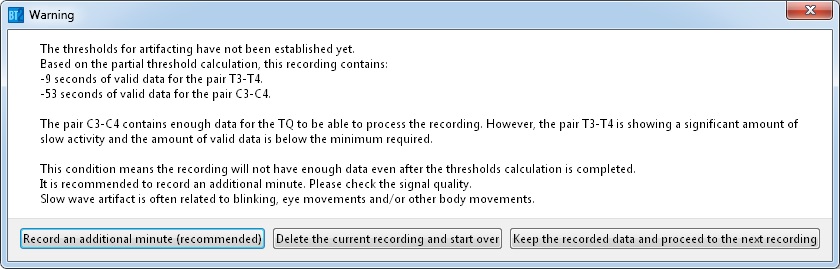
When the client has been instructed on the procedure and is ready with eyes close, press “Play” and the program will count down 5 seconds and then start. It will gather data until enough are collected. The program will then pause after a period (~ one minute) and a dialogue window will open. Here you can decide to move with the next recording,
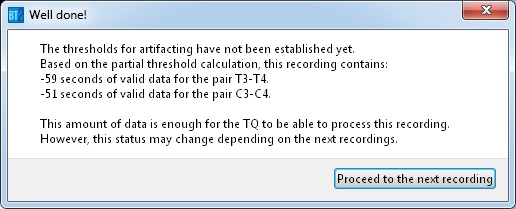
or continue gathering data if more are needed for processing or discard the data and try again.
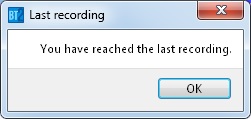
Threshold calculations – Thresholds are calculated using steps 1 and 2 with eyes closed and eyes open. It is possible that an acceptable recording (green) may be determined to be unacceptable (red) and need to be re-recorded at the end of step 2 EO once the threshold calculation is completed. Prepare the client for the next eyes open step and press “Play” again. The program will pause again, prompting you to continue. Continue in this way, moving the active electrodes to the new sites on the scalp as appropriate for each of the 5 steps of data gathering. You will then be notified that you have reached the last recording.
Re-recording a Step
Continue recording data until enough are available
Click on the step and press play. This will add seconds of data to the existing recording until enough data are collected for an assessment.
Remove the file and record fresh data for a site
Click the step to select which step to replace. Then click “Delete selected recording.” The step can now be repeated. This is useful when deciding whether data are good enough to use or need to be repeated. This should be done at the same time of the assessment, not on a different day.

Change to a new client
To start with a new client after recording for another client, click the “Record” button. You may need to click it twice.
Repeating with the same client
To start again with the same client after recording for him/her, click “Delete selected recording.”

Find a Recording
Easy access to the Sessions folder is the shortcut on your desktop labeled “Sessions.”
Inside here you should see any recordings you have completed.

To send a recording, attach the file to an email or upload to a designated location if requested.
TQ Gathering Instructions in Detail
See more detailed instructions for performing the TQ assessment.
Click to open TQ Gathering Instructions
Feedback Options
Click sound
The click sound is default feedback that plays when all targets are met (for x seconds). The click sound can be used with other feedback. It is activated when thresholds are met and sustained for at least 1 second by default. The click can be disabled or the interval can be changed in the Sound Settings configuration menu. Choose 0 so the click is played every time the targets are met.

Click Only Feedback
Mute the audio button by pressing it to mute design sounds and leave click feedback. This is a good option when using feedback with its own audio sound.
Configure Sounds including Click
Open the Sound Settings configuration panel to enable or disable the click sound.
Sustainment Time: Set the amount of time the feedback must be successful in order to trigger the click.
Repeat Every: Change the frequency that the click sound will be heard in seconds.
Click Volume: Make the click sound louder or softer as needed for any situation.
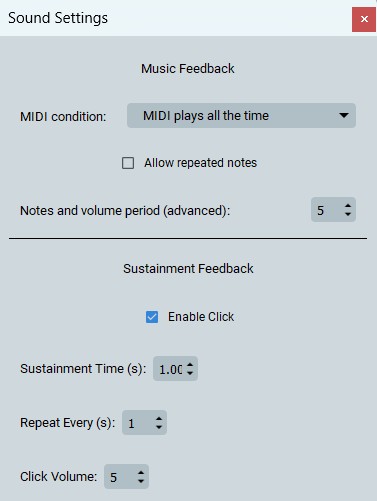
Music Feedback
This can be music that the brain composes as it is training, or it can be original songs with multiple voices that play as certain training goals are being met. The sound can be muted by clicking the Audio button.
Songs
Select a song from the available options in the Song menu. The background sound is always there. It changes to different parts depending on the overall success%.
In general, there’s a sound that corresponds to rewards and another that corresponds to inhibits. They are usually based on the ratio (comparison between current value and threshold value).
A sound may stop because the ratio was the same, or very close to the same value. The notes range fits the ratio range from the last X seconds. If the ratio is not changing a lot, the notes will not play — unless you check the “Allow repeated notes” in the music config menu
The notes usually play regardless of meeting the target or not.
There’s another option in the config menu that makes the notes contingent to the thresholds.
Shadow Feedback
A shadow is created over the computer screen that is linked to BT2’s feedback. You can adjust the brightness setting (intensity) and choose to have high/low brightness levels that switch back and forth or variable brightness with gradation. With shadow feedback whatever is on the screen under the shadow is a part of the training.
You can make your choice based in your preference. Some trainers might say continuous ratios is a good option for people with fast-dominant brains, whereas number of met targets or binary are good options for slow brains.
Binary (on/off)
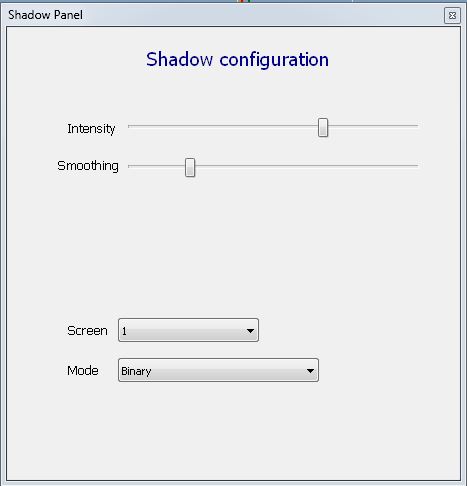
When all targets are met, the screen is at its brightest level. When one or more target is not met, the shadow makes the screen at its darkest level.
Smoothing may be used so changes are not too fast. This calculates an average. About 1/4 of the slider is about 250 mS of averaging which is the recommended setting. 100% is 1 second.
Binary has only 2 states: all targets passed (clear screen) or at least one of them didn’t pass (dark screen).
Number of met targets (incremental)
Different shades of dimming of the screen. Brighter as each additional target is met. If one target is met, the screen will be slightly dimmer.
Recalibrate is used when the signal maybe have gone out of the range of good shadow feedback. Clicking “Recalibrate” will reset the range of intensity.
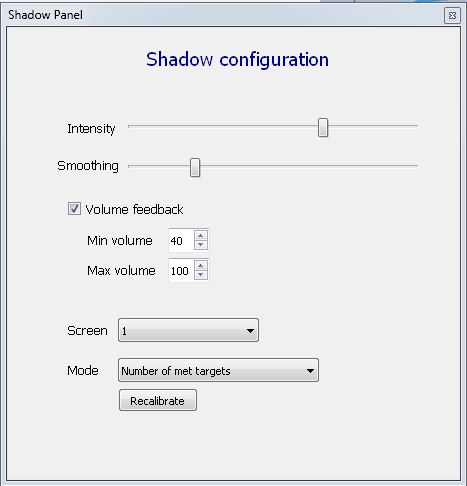
Number of met targets doesn’t show changes on the amplitude, but it shows how many targets are met. Shadow intensity jumps between levels (in this case, intensity is not a continuous scale).
Continuous
Continuous modes are not concerned with whether thresholds are met. They reflect whatever the brain is doing. As the bar (e.g. reward) goes up, the screen gets brighter. As the bar goes down, the screen gets darker. With multiple targets, all bars are included in this calculation.
Fixed range – The range is set automatically based on the signal. Start the design by pressing Play. Then click “Calibrate” to calculate the range for the shadow. Low is the highest intensity; High is the value that will create 100% brightness. When the number stop varying a lot, then uncheck “Calibrate.” If there is a lot artifact it is recommended to recalibrate. Set to minimum & max levels during calibration.
Standard deviation – Continuous ratios measures the current ratio (value divided by threshold). The scale is based on the standard deviation of the previous values. Continuous ratios controls the shadow level on a continuous scale. It shows every small variation in the amplitudes. However, the shadow state is not directly linked to meeting the goals (thresholds) or not. The shadow limits (lightest/darkest levels) are quite stable, with some small changes during the session.
The range limits will be calculated based on the standard deviation of all the data coming into the shadow. It will calculate based on the statistics what the best place to place the limits of the range would be. Standard deviation will keep track for the duration of the training.
Moving range – This option is available but has not been tested on many brains thus far. This will keep track of the data for a limited time. This is based on a certain period of time (e.g. 30 seconds). As new data come in, the old data are dropped and the limits of the range are constantly recalculated based on the last 30 seconds.
Moving range looks like continuous ratios, but the shadow limits (lightest/darkest) are moving constantly based on the last 30 seconds.
Volume feedback
Minimum volume and maximum value can be set to control the overall computer volume (e.g. Min: 85-Max: 100). Min is the minimum volume level between 0-100.
Game Feedback
Games give feedback on several parameters at one time. Every game has contingent and continuous feedback and most have sustainment feedback.
Continuous – Overall values of all thresholds, regardless of meeting target.
Contingent – Responds to target being met or not (on/off).
Sustainment – Triggered if all targets are met and sustained for at least 1 second.
To use Games as feedback, click “Select Feedback” from the control panel at the top of the program and select “Game.” The Games panel will open.

Select the game of your choice. The game screen will now open. Here you can read game instructions, select game settings and start the game.
Start the session first. Then press “Play” on the game screen to start the game.
Games Descriptions

Gold of Mine – Choose your miner and
walk through different game modes to
get coins throughout the mine.
- Contingent feedback makes the character move when all thresholds are met.
- Continuous feedback makes the coins change their size. When the brain does well, the coins are bigger and score more points.
- Sustainment – if sustained more than 1 second the character moves faster.
Settings include the following: Display: Window or Full screen; Auto Load/Skip Phases: Advance automatically or advance to the next level if performance is good enough, else repeat the level, or always repeat the level. Time limit and score limit serve as modifiers for progressing to the next level. Advancement is contingent on completing tasks within a specified time frame and achieving a minimum score. These time and score parameters are adjustable, with 100% of the score limit indicating the need to achieve the maximum score to proceed. Additionally, The base time has been calculated as 100%, allowing for flexibility to modify and extend or reduce the time as needed.

Buddha’s Nirvana – A kind of meditation game. Can be used with EO alpha (e.g. at temporals). Clear your mind and join Buddha in a meditation.
Keep your focus open to spin the flower and turn up the song.
- Contingent makes the flower change in size if targets are met.
- Continuous changes the size of the flower.
- Sustainment sparkles are seen as the brain is able to sustain the state.
The end of play gives a score of the overall achievement after the round (default of 1 minute). Then you can begin another round. The duration of the round can be set up to 5 minutes.
Settings allow volume control – master volume, music, sound effects plus time the round will last (1 – 5 minutes).

Rocket – Help the rocket explore space.
Progress through levels to win the game.
- Contingent feedback makes the rocket go up. It falls if all targets are not met.
- Continuous feedback
- Sustainment increases the distance traveled and reaching the planet.
Settings allow music volume control and length of time levels last.

Geyser – Help the geyser spread water.
Keep it going to advance to the next level.
- Contingent feedback makes the geyser go up. If targets are not met, the geyser will be at the 0 level.
- Continuous feedback will determine how high the geyser reaches based on how well the brain is doing.
- Sustainment for the time determined moves the game to the next level. The height must be sustained for 3 seconds for the first level.
Settings allow setting Game Duration (1 – 10 minutes). Five minutes is the default setting.

Escape from Bones Island – This is a client favorite. This is a challenging game with 10 levels. Run away from the skeleton chasing you. Do not let it catch you! If you get caught, you lose a life. If you lose 3 lives you lose the game. Then start the game again from Level 1. A favorite!
- Contingent – Reward makes the character go or stop; Inhibit makes the skeleton go or stop.
- Continuous make the character go faster or slower
- Sustainment makes the purse glow which makes the skeleton move backwards.
Finish the 10th Level to escape the island and complete the game. 1: forest in the morning; Level 2: forest at sunset; Level 3: forest at night. The skull is controlled by inhibits, so it is necessary for the protocol to have both rewards and inhibits.
Settings allow volume control of the music.
BT2 Game Expansion Pack
The BT2 Game Expansion Pack (expected in late August) adds 5 new brain-controlled games to your BT2 software—doubling your library with fresh, engaging options beyond the 5 default games. once installed, the games appear automatically in your BT2 game panel. This is a one-time purchase. Valid for a single BT2 license. Includes free updates whenever new versions of the games are released.

Comfy Reading – Train attention and mental stability with this interactive reading experience. As the brain hits its targets, the text appears on screen. Lose focus—and it fades away. Add any text you like, or load a file. With ambient distractions built in, this game is perfect for enhancing resilience to external noise.

Magic Garden – Watch your brain make nature bloom.
Each time the targeted brain state is achieved, vibrant flowers grow
in your virtual garden.

Wizard’s Defense – A classic tower defense game with a neurofeedback twist.
Reach your brain goals to fire towers and hold back enemy forces.
Strategic fun meets focused brain training.

Lake Odyssey – A dual-parameter fishing adventure. Increase your reward frequency while suppressing the inhibition frequency—and catch more fish with your mental net. Great for training balance and sustained control.

Fireworks – Celebrate your brain’s performance with a fireworks show!
The better the brain state, the more dazzling the display.
Media Player Feedback
Select videos to be used as feedback for a session. The default location will be C:||Program Files (x86)|Brain-Trainer|BT2|Brain-Trainer|media. Currently BT2 supports .mp4, .mov, .avi and .webm video extensions.
Options allow the user to move a video file to the playlist. Use the “folder” icon to browse to the location of the media file to be loaded as an option.
The “trash” button will remove the file from the Options. Select (click) the video file and use the ( > ) arrow to add it to the playlist. The “trash” button will remove the file from the playlist. Up ( ^ ) and down arrows will change the position of a file in the list.
The volume slider controls the volume of the media file. This may be turned all the way down to hear only the default sounds of the protocol.
Media player feedback is currently play/pause. The video will play when all targets are met.
Troubleshooting
If you have any issues, check out our page of known issues and helpful tips.
Click to open BT2 Troubleshooting