TQ8 Manual
Current version: 1.1 Windows OS
Introduction
The Trainer’s QEEG (TQ) is designed to identify habitual energy patterns related to desired changes in brain function and performance.
Disclaimer: The Trainer’s QEEG (TQ) is designed to identify habitual energy patterns related to desired changes in brain function and performance. IT IS NOT INTENDED AS A TOOL FOR DIAGNOSIS. If you have any problem with the TQ8 software, please report it by sending an e-mail to [email protected]
Table of Contents
Setting up your software
Download your files
Install your software
Open your software
Activate the TQ8
Automatic software update
Help
Settings
Prepare your client files
Create Client Directory
Complete Client Report
Record EEG for an assessment
Create a new map
Load client data files
Auto-artifacting
Manual artifacting
Open a saved map
Presentation file
Training plan
Setting up the TQ8
The first step toward using your TQ8 software is the software installation. This means you must have a TQ8 software setup installer file on your computer that you will run. In order to run the setup file it must be saved on your computer.
Download
After your purchase you should receive an order email with download and license information. Save this email for future reference. It contains your license key.
Save the TQ8 installer to your computer. The likely location by default is your computer’s Downloads folder. You can then open the Downloads folder to find the file you have downloaded.
Once a file is saved to your computer and extracted if needed, it is ready to be run.
Install

Open the folder where you have saved the installer.
Double-click the file to run the setup installer.
This will create a Brain-Trainer folder in your local drive with a shortcut that can be found on your desktop to launch the program.
Default location: C:\Program Files (x86)\Brain-Trainer
Open your TQ8 software

Double-click the TQ8 launcher shortcut from your desktop to start the TQ8 program. The first time the program is opened, if it cannot find a license it will ask for the license key to be entered.
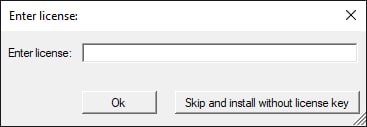
Activate your license
Open the order email you received after placing your order. Copy the license key and paste it into the “License key” field.
Adding the license key later
If this step is skipped, the TQ8 will run in limited mode. Assessments and training plans cannot be generated in limited mode. In this case, the license key can be added at a later time.
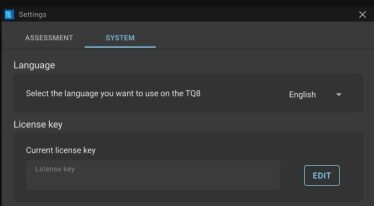
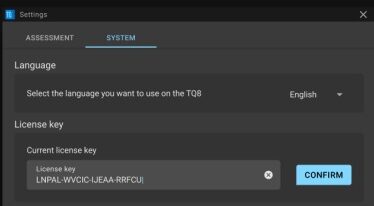
Open “Settings” and select “SYSTEM.” Click the “EDIT” button. Enter your key. Then click “Confirm.”
Updates to the TQ8
The TQ8 automatically updates when changes to the program are ready. When the program is opened, the new update will start to be downloaded in the background. The next time the TQ8 is opened, the update will be installed. You can even close the program while updating continues in the background.
Help

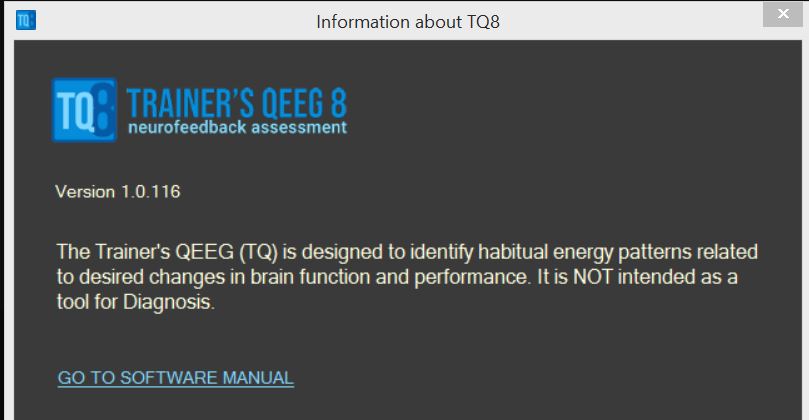
In the Home screen at the top right is the “info” icon. Click this link for information about the TQ8.In the window that opens is a link that will open this online TQ8 manual from within the software.
Settings

Click “Settings” in the top right of the home page to open settings.
Here you have the option of changing the language of the TQ8, changing the default location where the TQ8 will search for client files, select to save the client’s assessment in the client folder by default, select which pages to display in the TQ8 and select what format to use to display protocols (BT2 or BT4BE).
Assessment Settings
File location
Choose the folder where the TQ8 will search for client files by default. You will be able to browse from there, but it will save time to set a default location now.
Example file location:
Save map in the client folder
Feature to be enabled in future. We recommend you keep this option on to maintain your file organization.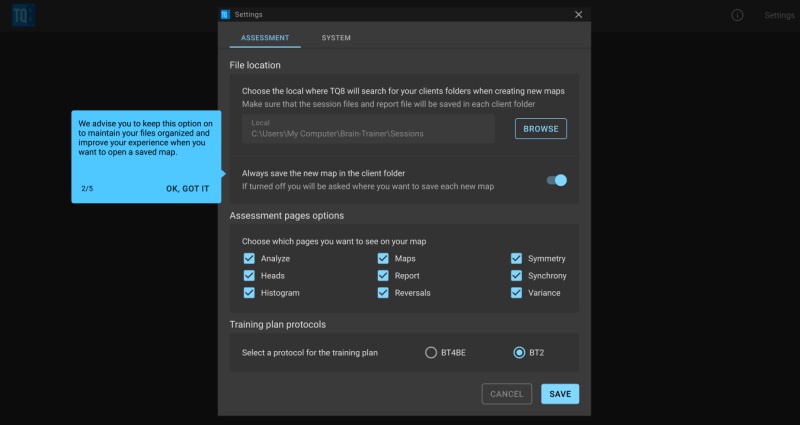
Assessment pages options
Choose which pages you want to see in the final assessment.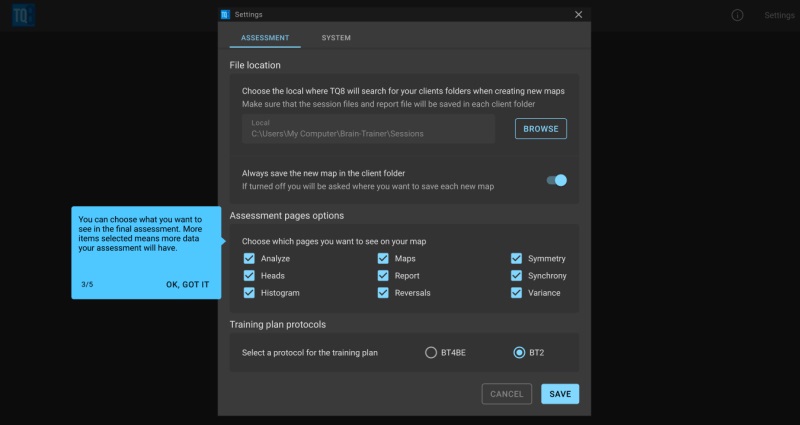
Training plan protocols
Select which software’s protocol format to display, BT2 or Brain-Trainer for BioEra (BT4BE).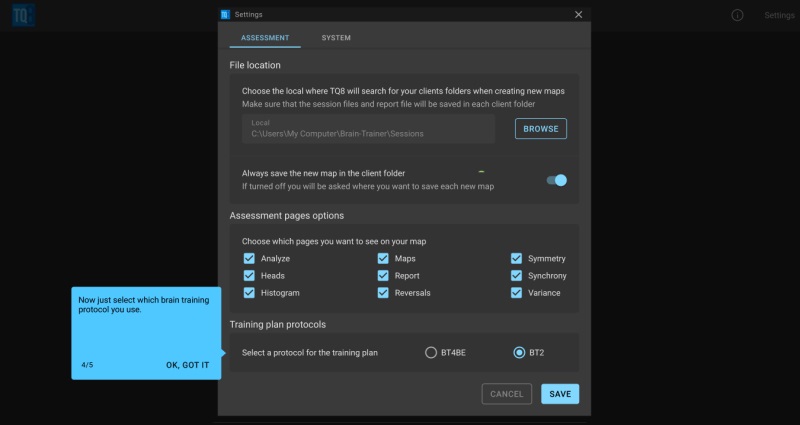
System settings
Language
Select the language you want to use on the TQ8. Select from English, Portuguese, Spanish, Italian, German and French.
License key
This is where you can enter or edit your license key.
Save settings
Save the settings so you do not need to select them again.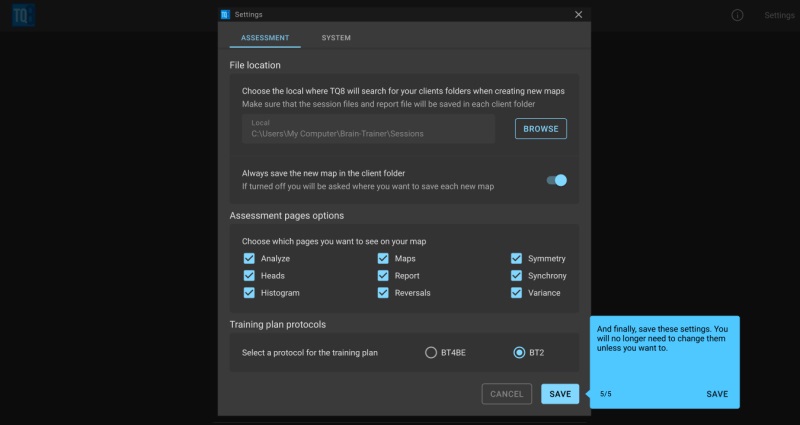
Preparing Your Files
Creating the client directory (folder)
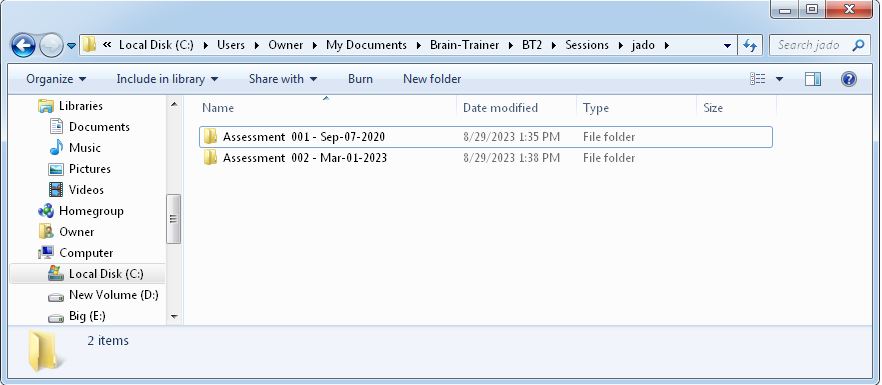
In order for the program to find the client files to load, it is important that each client has his/her own folder. Inside this folder there must be at least one assessment folder. “Assessment” must be part of the filename and it must come first. Brain-Trainer software (BT2, BT4BE) names the folder correctly by default, including a date.
Complete Client Report
The Client Report is considered when determining the final selections for the Whole-Brain Training Plan. This should be completed by the trainer through an interview with the trainee and additional members of the support system. Alternatively, a client who is self-training can fill out the report on his/her own or on behalf of a family member.
The trainer should save this Client Report file on his/her computer in the folder dedicated to the client. The older CSV file type does not load into the TQ8 so the new JSON file type is required. To get the client report, go to your Trainer account and find the client report you want and select, “view.”

Now click, “Download JSON” for Whole-Brain Training Plan (TQ8) and save to the client’s folder. The default location for BT2 users is C:\Program Files (x86)\Brain-Trainer\BT2\Sessions, inside the client folder you have created.

Record EEG for an assessment
Recording the assessment means gathering EEG data from the brain to be used in creating a personalized Whole-Brain training plan. These files should be saved to the client folder. Trainers using Brain-Trainer software will find assessment gathering instructions in our online resources.
Creating a New Map
Load data files
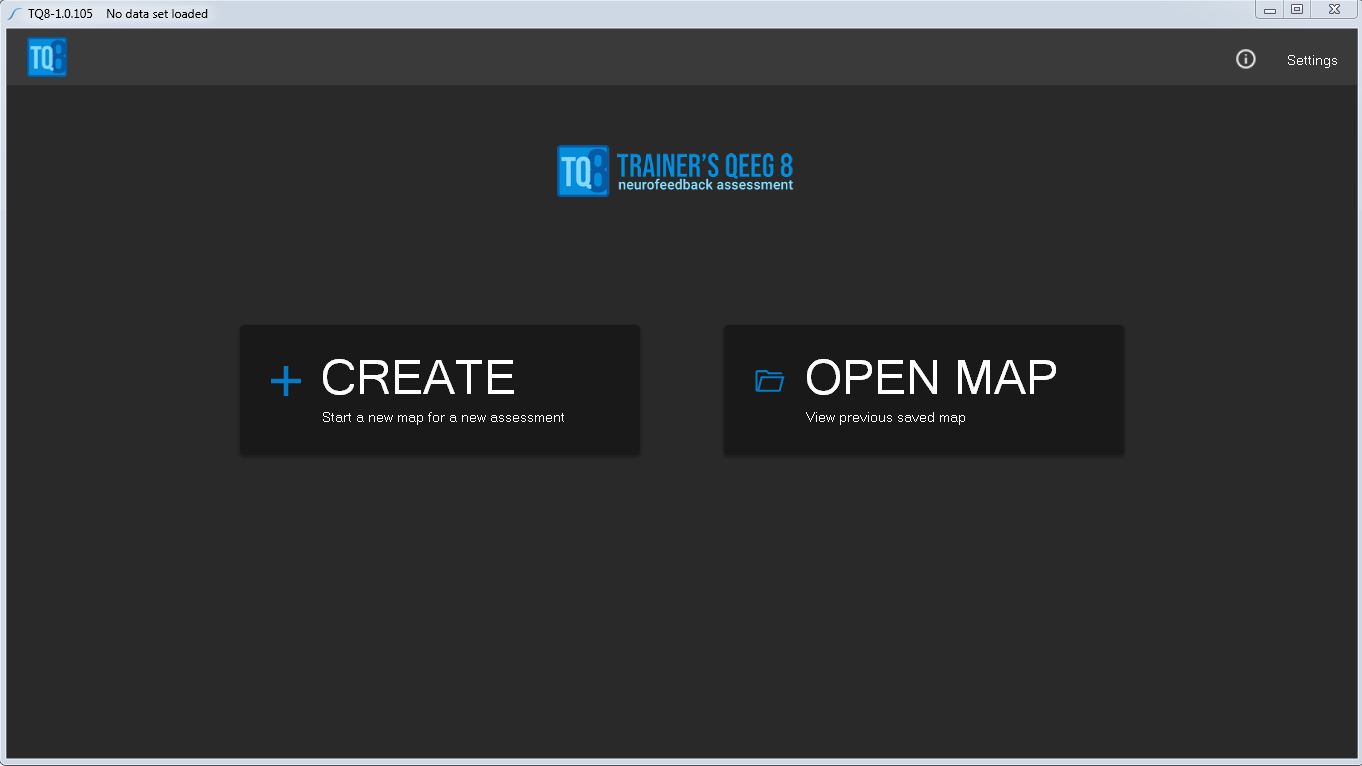
Click “Create” to open the “Create Map” dialogue window.
Under Client data, select a client. The list of clients will include all folders you have created within your file saving location. Next, under Assessment, select the assessment folder for the client.
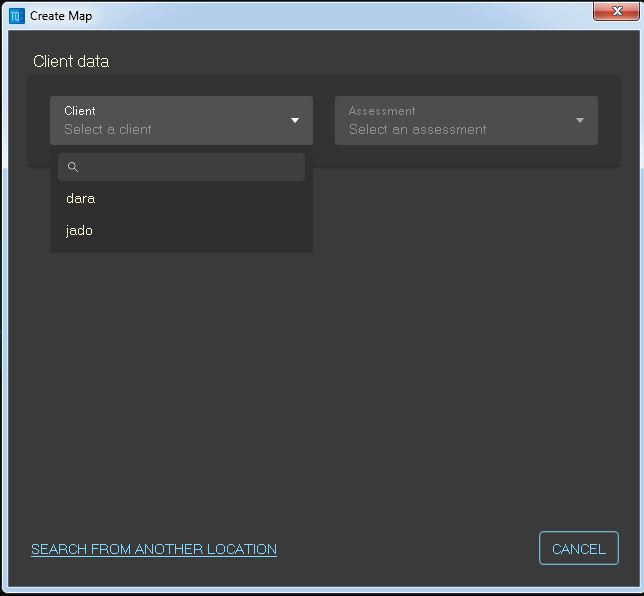
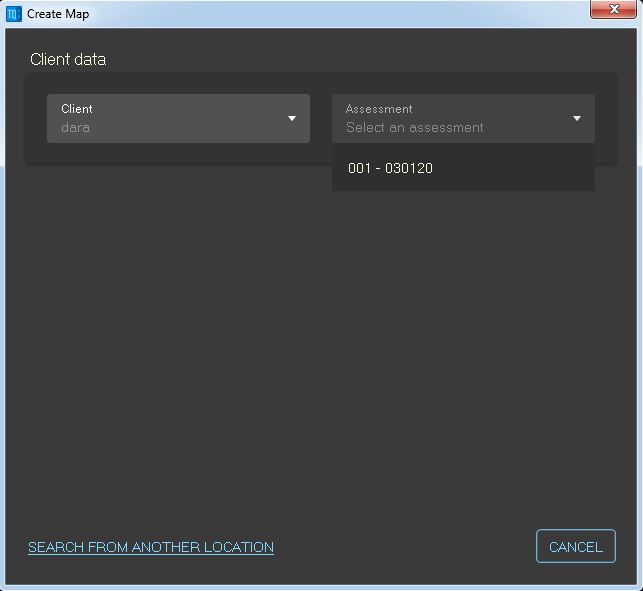
Alternatively, you can use the “SEARCH FROM ANOTHER LOCATION” option to browse to the location where you have saved client files. This is an option for users of other software such as BioExplorer where files and folders may have other naming conventions.
You will not see the client’s recorded assessment data files, but they will be selected if they have been saved to the folder you have chosen. Once you have selected client files, you will see them listed. If any files are missing, you may search from another location.
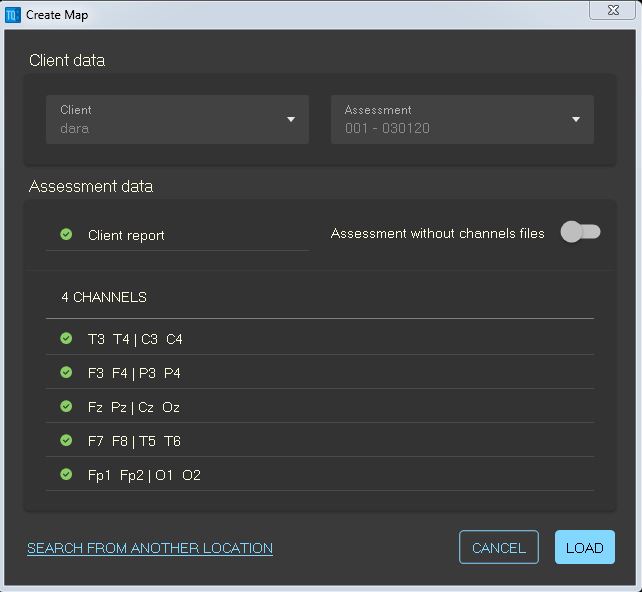
You may create an assessment without EEG data, but the Client Report questionnaire is always required. Use the toggle to select this option.
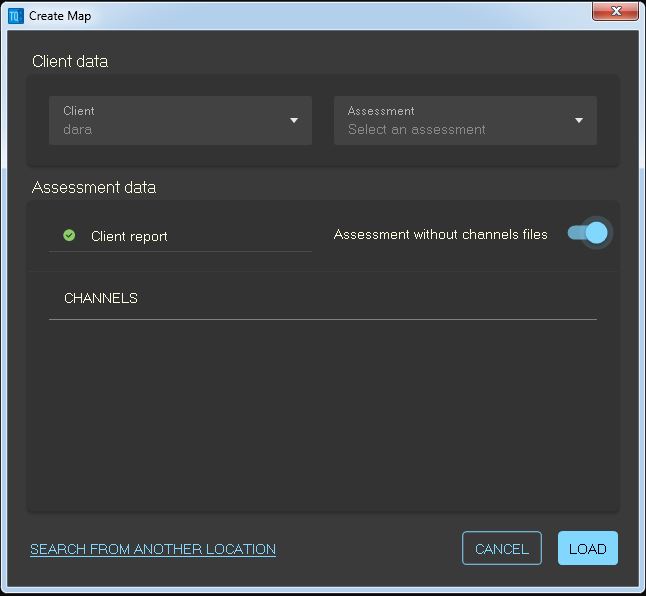
Finally, click LOAD.
Artifacting
After loading files, the artifacting page will open. Notice that here you have the option to edit client data by clicking the “edit” icon at the top.
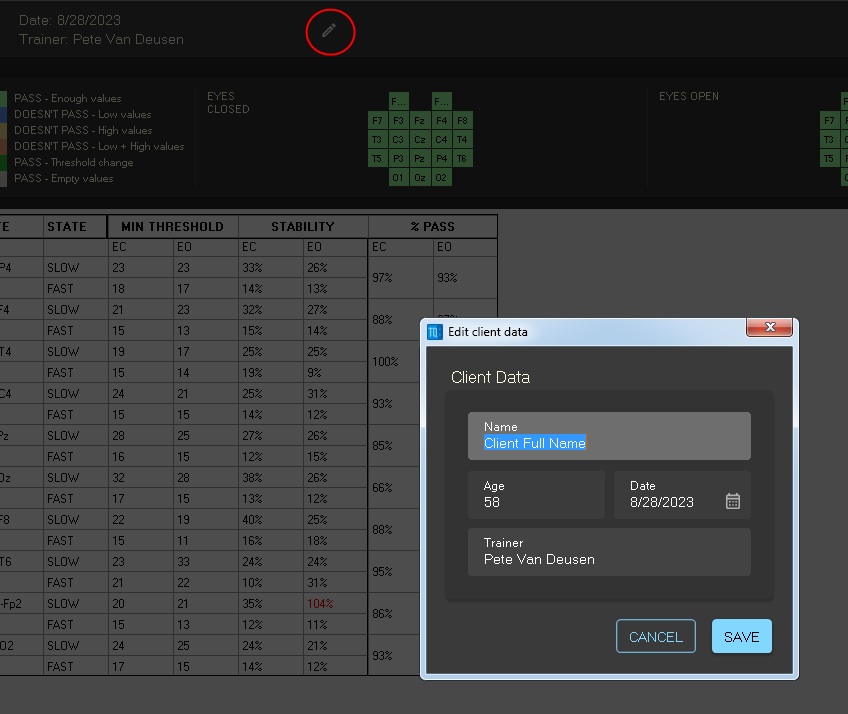
You can click on a column to understand what it means.
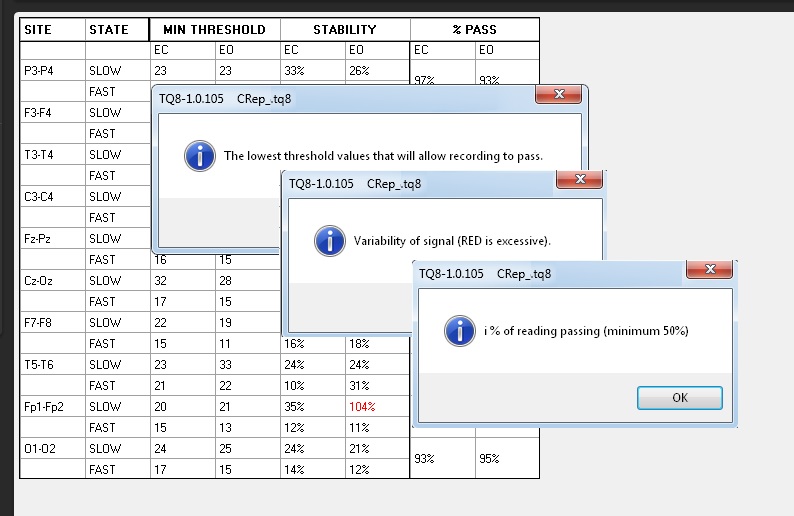
Automatic artifacting
Auto mode is selected by default, and we recommend you use this mode unless and until you have the skills for artifacting manually.
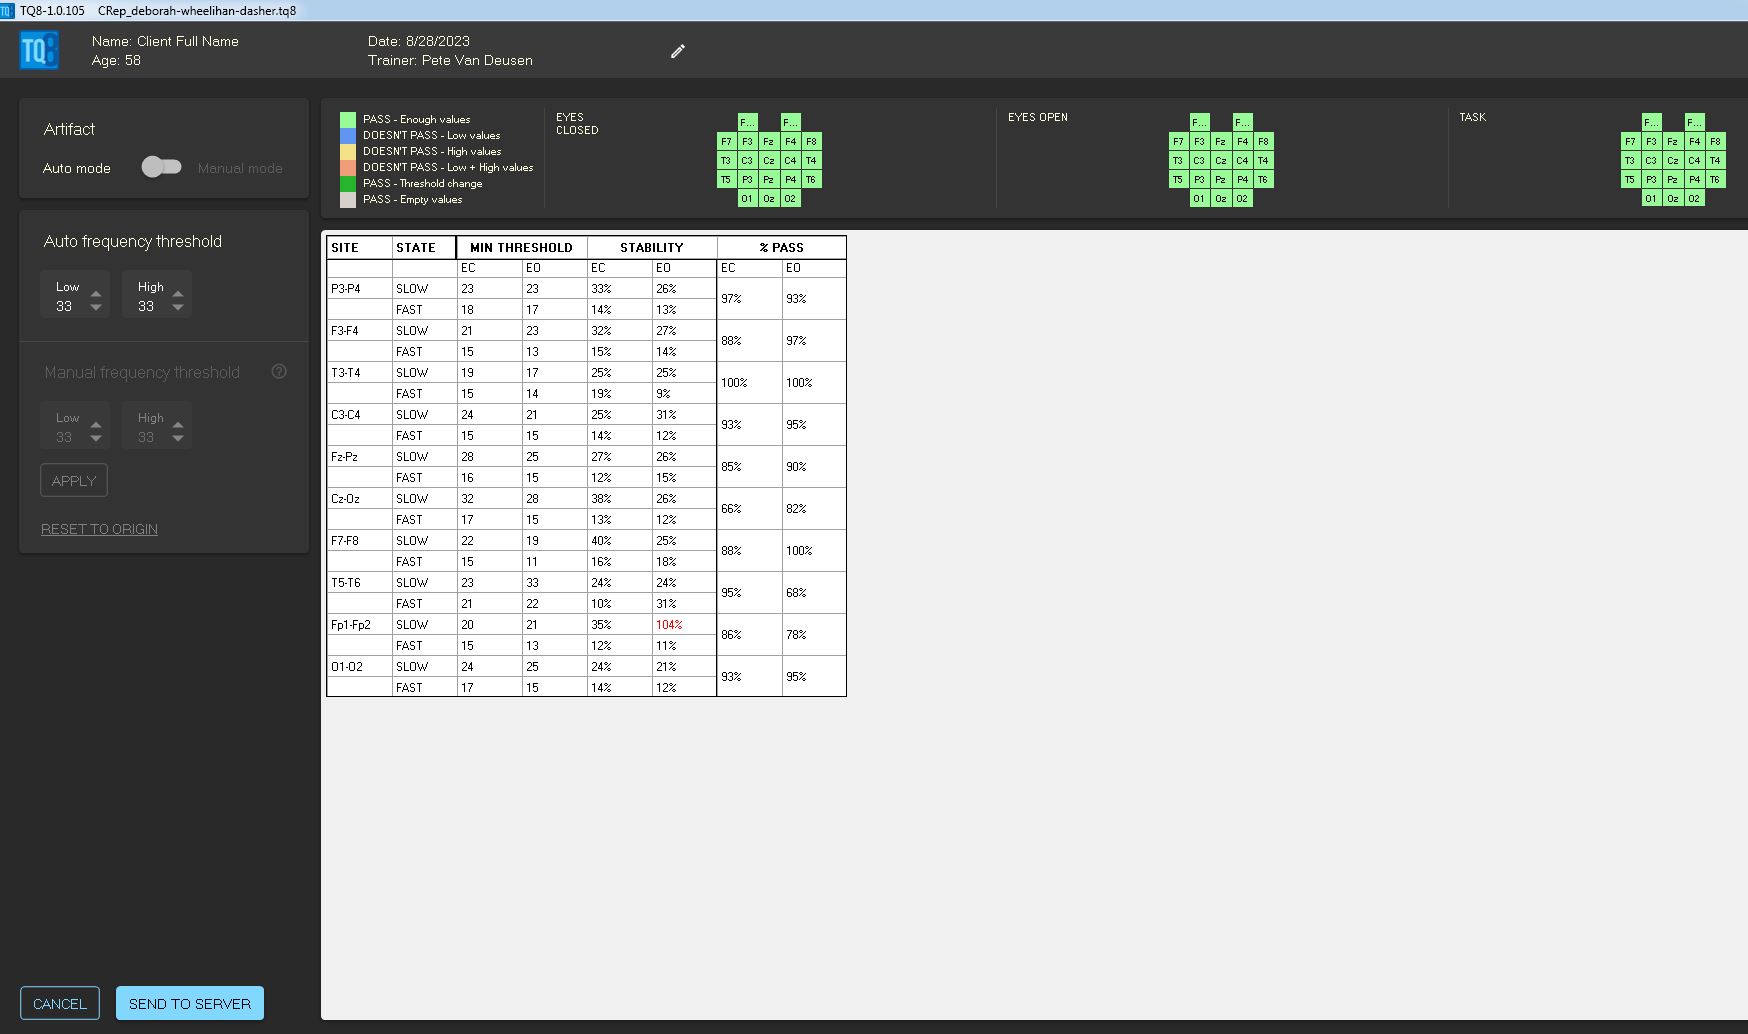
Click SEND TO SERVER for processing.
Manual artifacting
If you have the skills for artifacting, you may change thresholds and decide to include or exclude data based on your judgement. See instructions of manual artifacting.

Opening a Saved Map
The TQ8 allows users to open saved assessment files (.tq8 extension). TQ8 maps can be opened if the user has not purchased a TQ8 license key. TQ8 without a license key will not display all the views and functions of a TQ8 with a license key.
- Please download and install the TQ8.
- Open the TQ8. If you do not have a license, do not enter it.
- Click “Open map.”
- Click “Search from another location” – wherever you have saved it.
Presentation File
Summary Report
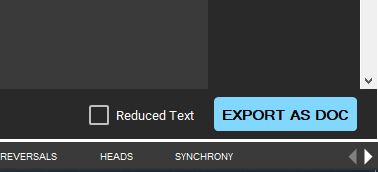
Once the data are sent to the server, the processed file will display the Summary Report. Here you have the option to eliminate explanatory text and display just the findings relevant to the client’s data. Tick the “Reduced text” box at the bottom right for this.
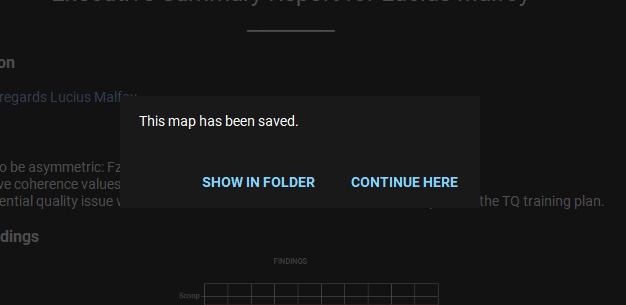
At this time you may save the entire assessment file. Click the “save map” icon at the top right of the program. To return to the start to begin creating a new map, click the “system home” icon.
![]()
Once the file is saved you may open the folder to see it there or continue with the TQ8 file.
The summary report page can be exported as a Microsoft Office Word DOC file to be shared if desired. Click “EXPORT AS DOC” to save the Summary page. Once saved, the file can be opened, formatted, and printed.
If you do not have Microsoft Word or exporting as DOC is not successful, you can select the “print” (printer) icon to print as PDF file.

Setting Goals
Before beginning training or making decisions about the training plan, goals should be established. The GOALS page will display the top issues and their rankings reported by the client in the subjective Client Report questionnaire. Select from these to set goals. Select up to six goals to track over the period of training.
Issues can be selected in two ways. Tick the box under “Track” to select an issue. The issues table can be sorted according to either Rank or Category by clicking the column header. Alternatively, select from the drop-down boxes. When using the drop-down boxes, the issues in the selected category from which to choose are displayed.
Select the number of cycles of the 5-block training plan you estimate training.
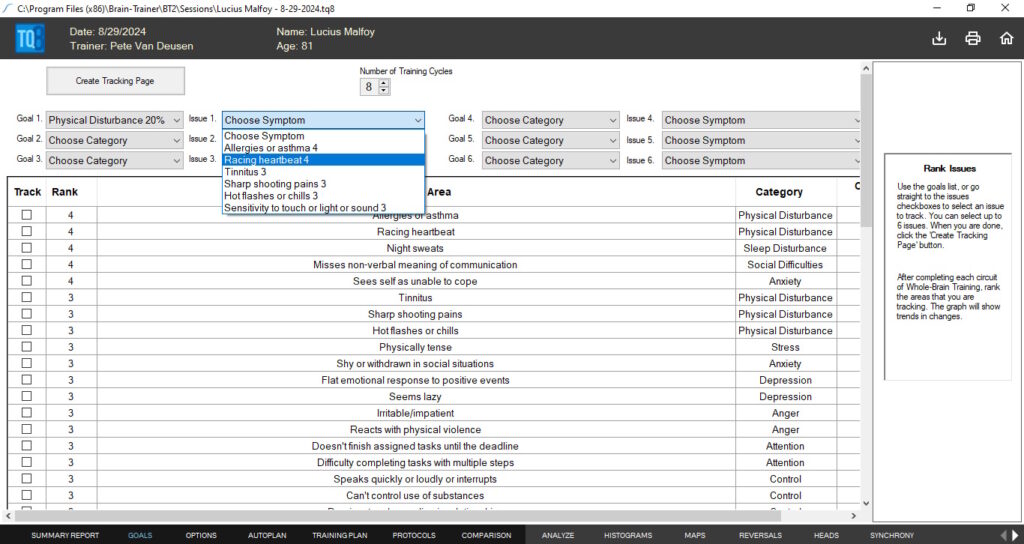
After selecting issues to track, click “Create Tracking Page.” After each cycle of 5 blocks, have the client re-rank the issues. The chart will show the trend over time.
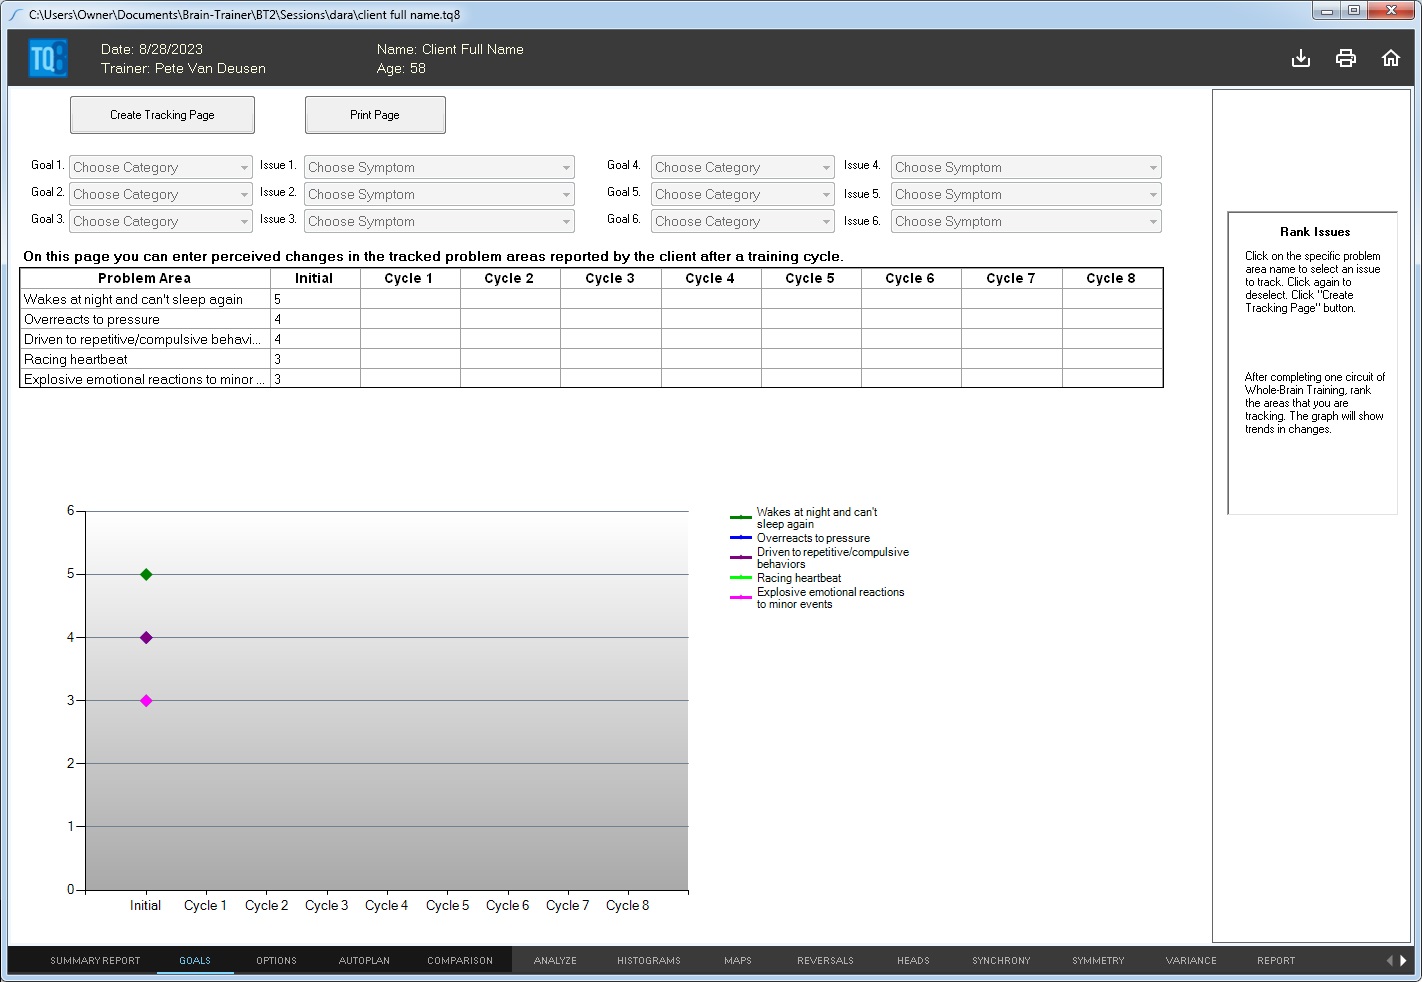
Creating the Whole-Brain Training Plan
OPTIONS and AUTOPLAN pages are two potential sources of the Whole-Brain Training plan. In either page the user can edit specific details, write in empty lines and drag & drop protocols to different locations. The trainer has the option of choosing 2-channel protocols only or autism protocols only.

Autoplan
The Autoplan page is the source of the automatically selected Whole-Brain training plan. It can be used completely automatically, or it may be adjusted based on the trainer’s experience.
Options (Manual Protocol selections)
Experienced trainers may prefer to view more protocols from which to select and further customize the training plan. Click “Load protocols” to show the protocols from which to choose. Double-click in the “select field of a line to select a protocol. Double-click again to de-select.
Create the plan
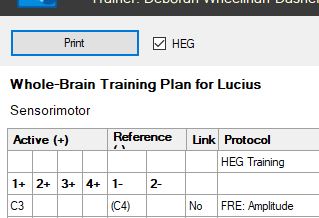
Scroll to the top and click the “Create Plan” button. The finalized plan will be displayed in the “Training Plan” page. HEG training can be selected or deselected here as desired. The plan can be printed to PDF or paper file if desired.
![]() This manual is under construction. If you have any issues, send an e-mail to TQ8
This manual is under construction. If you have any issues, send an e-mail to TQ8
Copyright © 2024, Brain-Trainer International, Inc.